let’s update this, go back to our page. Here we go. And our field is now not visible anymore. But we can still see it in the HTML. So if you go on to inspect element, and just hover over here to see, that could be one of the last ones of these elements right here.
Here we go. We have our field number four, it was already filled with the client ID, and it’s not visible. But if you want to see it in action again, you can just change this value over to text. And you see here is the form field. But in our case, it should be hidden by default.

Now that we have this in place, let’s go ahead and do a test if it is received by Active Campaign. So we have that information filled out. Let’s submit this, be signed up, we should see our contact now in the contact records. Here we go. This is the user with its client ID. So now we have all the information we would need to do this Google Analytics and transaction hit in our Active Campaign.
We just need to have a way to actually transfer it onto Google Analytics. And this is where automations come in. We want to trigger an automation when somebody adds a new tag. So let’s go ahead and add a new automation will create a new automation from scratch. And we want to trigger this when a user adds a tag. This tag is freely definable, in our case, it was offline conversion.
So let’s stick with that. And you can choose if the user can only run once or create one conversion, or multiple times. I’ll go with multiple times here. Let’s put this into the start. And now we need to define the action that we want to take within automation. Now, we don’t want to send an email. We actually want to simply post this to a web hook. So post contact data to a URL of your choice.
We choose this and we need to enter the URL. For now I would say we’ll just go with the testing site which is web hook dot site that you can go to. And we’ll give you a web hook URL that you can test. So we’ll just copy this to clipboard and put this into this field. Let’s save this. And at the end, once the user has gone through this step, I want to end this automation.
So he’s not stuck inside of the automation itself, we need to give our automation a name. Let’s go with offline conversion here as well and save this. Now, we need to turn this all active and try it out by going into our contact record. Let’s add our offline conversion tag. It is added. Now this contact should be added to our automation, let’s reload this contact. And you can see he entered your automation and he completed it already.
When we click on the automation itself and view how the user went through it. We can see this was posted to the web hook itself. And then he ended. So we should have new data on our web hook site here. Yes, it seems like all this contact data was sent over to the web hook.
So on the automation side, on Active Campaign side, everything is working already correctly. Now, we need to send this data into Google Analytics. This is where our App Script comes in. Now, an app script it’s actually something that is connected to a Google Sheet. I will give you the link in the description below.
You can just make a copy into your Google Drive account. And once you have that open and copy to your Drive account, you need to do some configuration. So the first thing you need to do is go over to tools and to the script editor and click on the publish button right here and deploy as web app.

Now this will give us a our web URL which we will then put into Active Campaign. Okay, once the window opens, we can click here on execute the app as me and who has access to the app. Well, anyone even anonymous users will update. And we need to review some permissions. Now here, you need to utilize your Google account.
And it will tell you that it will see an edit your spreadsheets which is exactly that spreadsheet just here. And we also need to confirm that we will connect to an external service in our case, that is Google Analytics. Let’s allowed us.
And back in our app, we should now get our web app URL which we will utilize in Active Campaign. So copy that can close this now and put this into our automation, right here. So instead of the website, we will now post this to our Google app script. Let’s save this. And before we do a test, let’s look at our sheet that we have created.
In our sheet will see a log file. So every hit that was sent over is here with all the configurations. But since Active Campaign just provides the client ID, we actually need to define a few things that we want to have our hit that we sent over to Google Analytics filled by. So first of all, you will need to fill out the tracking ID right here, I’ve already done this.
But if it’s not filled out, your hit will definitely fail. You can leave the version untouch. The client ID will be filled by web hooks. So don’t change this around. We’ll send over an event a transaction and as a category offline as an action. And then and as event label our client ID. Now you can change this around, you can customize this.
But just be aware that this is already pre configured to work. And if you change anything, you might need to readjust it. This is set as a non interaction hit as true. And then as a transaction ID, I have actually just taken a formula here to come up with a random ID that we would later be able to recognize with O and then the number.
So offline and then a number that is simply random. Then we come to our ecommerce hit. So ecommerce hit has affiliation which is not filled out. Every field that is not filled out for just simply be dropped. We can put in our revenue. So if our conversion is worth $100, we put that in. The tax, the shipping information, I just put this to zero, the transaction coupon if there was any.

And you can also put in product information. So purchase a product, product ID, the quantity, the price and the category if you choose so. You could even put in multiple products. And for that, I will just encourage you to copy here, the second product, you could put a third product, fourth product and so on in.
Now, this information will be used to then construct the hit an ecommerce transaction that is sent to Google Analytics. So if you done anything wrong here, it might not work. So be aware of the fields or in the end, you might need to debug or circle back to the old version here which is already filled out correctly.
All right, now that we have that setup we already done, we can now go ahead and test this whole implementation by going back to our contact record. And just getting rid of this tag again and adding it back and then head over to Google Analytics where the data should be received. Let’s go into the events. And here we go.

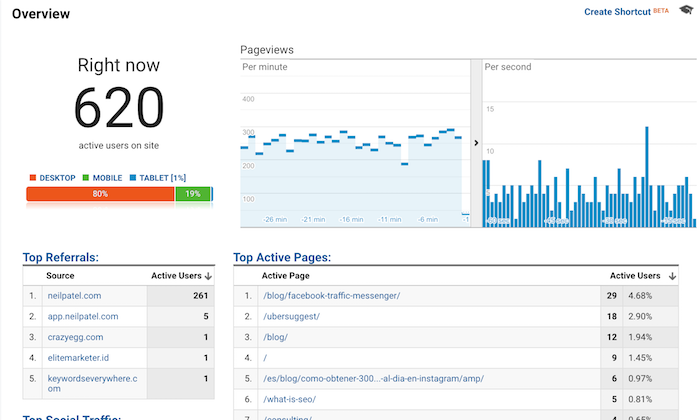
We have a new event, we don’t see anything here because it’s a non interaction hit. So under events last 30 minutes, we now see our transaction offline with the right client ID that we also hopefully have inside of our contact record. Yes. And this has now produced a conversion. And later on, we will be able to then look this up in our user explorer report if you’re interested in where the user came from.
Or inside of our conversion reports here under ecommerce, we would also see this in the sales performance as an offline transaction that happened. Now to spend us all to the end, we haven’t yet actually submitted a version.
So we’ll put this live on to our website that fills it out our hidden form field. So I’m going to add this in, publish this, and it goes live to our website. So this is how you can automatically create an offline conversion by editing attack inside of Active Campaign. All right, so we have gone through the tutorial on how to set this up.
And I hope you like this tracking technique. It definitely helped me out to track more my conversions more closely. I’d love to hear from you if you utilize this functionality. And if you have any problems to set this up. Let me know in the comments down below.
And obviously we could also with some customizations make this more dynamic or support this over to other CRM systems. So if you are interested in that, let me also know in the comments down below and maybe I could rewrite the script for other platforms.
Now, if you haven’t yet, then hit that subscribe button over there to stay up to date with everything that we do here on this channel. And my name is Julian. See in the next one. English SHOW CHAT REPLAY
